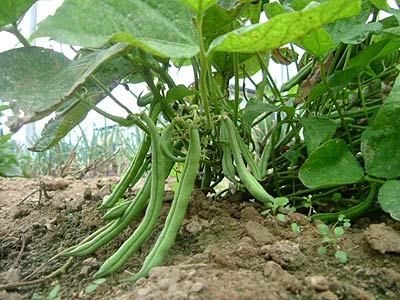
Beans are one of the most consumed staple foods in Nigeria alongside rice and cassava. Also, they are one of the most affordable sources of protein. Interestingly, despite the massive consumption of beans in the country, a signification proportion of the beans consumed are imported from Niger Republic. This doesn’t mean there are no farmers involved in beans farming, it just simply means their yield cannot meet the demand of the over 170 million Nigerians.
There’s an urgent need for more beans farmers and the market demand ensures that this venture guarantees prospective returns on their investments.
We’ve created this step by step guide to help current and aspiring farmers in their beans farming enterprise. The process isn’t so difficult; all you need is to be equipped with the right information and capital to get started.

1. Site Selection
The first thing you have to do before you embark on farming to ascertain the viability of the land. The lands in South Eastern and South Western parts of Nigeria are very good for beans farming. However, beans don’t grow well in areas with too much rain. A moderately distributed rainfall of about 300-400 mm per crop cycle is ideal for beans farming. The soil should have pH of 6-7 (neutral to slightly acidic). It should also be a well drained soil. A damp soil will rot the beans prior to germination.
After selecting the right land, the next step is to prepare the land for planting. You should clear the land properly and plough the land to loosen the earth.
2. Seed Selection
There are different varieties of bean and you should properly select the seeds that you’ll be using for planting. This is to ensure you are planting healthy seeds and not the shriveled or damaged ones. The seeds should be planted 2 inches deep into the soil, and then covered it with the surface soil.
Beans usually sprout quite quickly. Within 6 days of planting the seed is already germinating and you can see a good sprout within 2 weeks.
In most cases, beans farming doesn’t require fertilizer especially if the quality of the soil is quite good in terms of fertility. In the case of a poor soil, the fertilizer can be applied to the soil. The ideal fertilizer for beans farming is the nitrogen type. The application should be moderate. Excessive application can reduce the quantity of the beans yield.
3. Planting
The beans should be planted with the eye of the beans facing downwards. The seeds should be planted 4 to 6″ apart. You should water the soil immediately and continue to water it regular until it sprouts. When watering the plant, ensure the leaves don’t get wet, this will prevent mould growth. You shouldn’t plant the seeds at the same spot more than once every four years. Also, beans shouldn’t be planted close to onions.
After planting, you need to take care of the plant to enable a favourable harvest. Proper weeding is necessary to produce the right quality of plant. Also, you have to be careful how you uproot the weeds so that you don’t disturb the roots of the bean plant.
The plant grows either as bush or pole type. The bush beans begin producing before the pole and the seeds come out all at once. This is why you can stagger your planting so that you can have a continuous yield over a period of time. On the other hand, the pole beans will continue to produce for up to 2 months. You may need to help your pole beans adapt to the initial climb. However, you should keep the plant well watered. You can also improve the yield of the pole beans by adding compost or manure midway through the growing season.
4. Harvesting
Harvesting beans is a very diligent process. A dry weather is very essential for harvest and will prolong the dry conditions and extreme wetness is harmful to the crop.
Generally, harvest is done by gently pulling the bean from the vine or by snapping it off the vine end. It takes 60 to 80 days after planting before you can begin harvesting. Harvesting is dependent on several factors, the 2 most important are the type of growth and the stage of growth.
Based on the stage of growth, the beans are harvested at the snap, shell or dry stage.
The snap beans are harvested when the seeds are still quite still immature. A problem with harvesting at the snap stage is that this type of beans doesn’t develop the proper flavor and texture. However the best way to determine the suitability of the beans for harvest at this stage is by harvesting one or two pods to ascertain the quality before going into full scale harvest. The best indicator of snap beans is the diameter of their pods. The ideal diameter is between 1/4 – 1/8 “. You can choose to allow your snap beans to develop into dry beans before you harvest.
The shell beans are harvested at a later time compared to the snap beans. Once the enclosed seeds become quite obvious, the beans can be harvested. The beans can be eaten fresh or dried.
The dry beans are harvested when the seeds have reached complete maturity.. The dry beans should be grown in plenty of space and ventilation. If during the harvest period, there’s a spell of rain, you can remove the plants from the ground and hang it upside down to allow drying to continue. The process of harvest requires threshing to remove the extraneous pod materials.
Overall, if you harvest beans early, you may not get the right flavor and texture. On the other hand, if you leave it too late, the beans can become overgrown and tough. However, you will tend to understand your plant as you continue to cultivate the crop.
Generally, the process of planting beans if properly done can give you a 100% returns on your investments.